THE TOOLS AND SUPPLIES:

So you desided that what you want to do with your freshly cut Rhubarb.....make a Jam. Well before you even harvest them it's best to have all the tools you need. First of course would be a recipie....I got this book at Walmart. But I also looked all over the internet for idea's.

This is just one of many options for making homemade Jam. You could also use Jello...the powder kind. For that it could be a no flavor version or a fruit version.

You will need a pot to boil the Jars in. A tall pot like this is great to use if you don't have a actuall canning pot. It is tall enough to handle the taller Jars and still allow them to be covered with water.

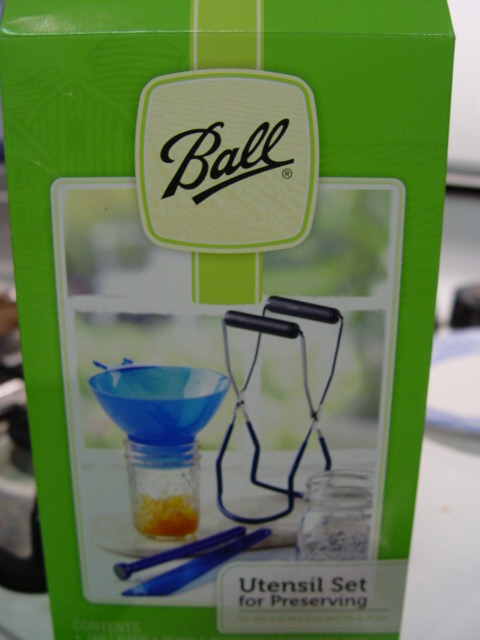
To properly can it is best to make sure you have a few tools around. This is a simple kit that I bought. It has a funnel to aid in keeping the jar rim clean and Jam free. A utensil to move the Jars in and out of the Boiling water. There is a lid tool....that is just simply a stick with a magnet on it to get the lids out of the water. Then there is another tool that helps remove bubbles and aids in determining your head space. Head space is the amount of space from the top of the rim that you need to leave open. For what I was using it was 1/4" head space meaning I could fill the Jar to 1/4" from the top.

This is just one of the many kinds of Canning Jars you can buy. This one is a little fancy but can add to the appeal of a Jam. This is the smallest jar. A regular mouth (instead of wide). It is 4oz. The recipie I used yeilded 6 1/2 pint Jars....that would have been 12 of these little ones....just so you know. But I had some 1/2 pints so I used 2 of those to cut down on the amount of work. It's best when planning on a project like this to chose a jar that will be best for your application. Some freeze well and some don't. Some have a wide mouth others just regular.

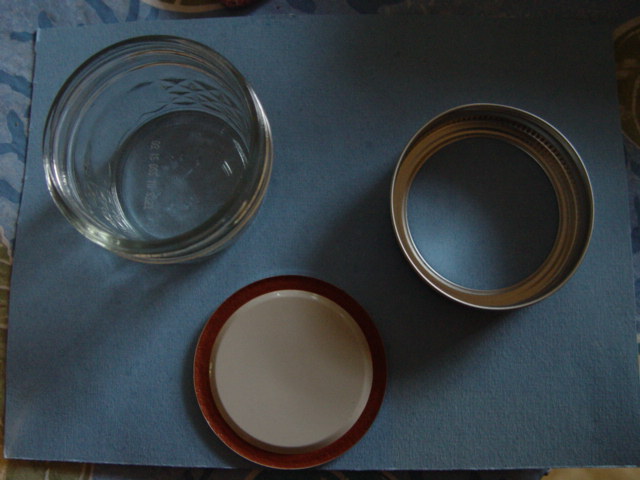
These next 2 pictures I broke the Jar down to explain a little bit about each part. First we have on the left is the lid that seals. Then you have the jar and then the band that spins on.

The next picture is a underside view of the lid parts. The red/orange ring is the rubber part that seals. It is very important that this part is not bent or damaged.

Another addition that could be important would be spare lids. When canning if you don't get the seal with in the first 24 hours you need to try to seal again...but you need a new lid. Not the band or Jar just the lid.
THE PREPERATION:
The Jars need to boil for at least 10 min before you put anything in them. This is for a few different reasons. 1 to sterilize the Jars, and 2 so they are nice and hot to aid in sealing. For best results it's best to leave them boiling while you prepare your product and remove them as you are ready to fill.

The lids should be heated in a separate pot as they don't need to be boiling as long....they just need to get too the boiling point mostly. The main reason to have these guys warm is so the rubber is a little bit softer so when it cools it will create a seal agains the jar rim.
Well now you are ready to get started in preparing your product. Happy Canning
 Now for the best part of this whole evolution...The taste test. I placed lables on all the Jars so we know the date they were made. The Melbby part was because it was made by me (Melissa) and the Rhubarb was from the gardens of Melissa and Debby (my mom).
 After hearing the small pop and air being sucked in here is what the Jam looks like now. It smelled wonderful and it was more solid than when first placed in the Jar.
 We popped a few slices of bread in the toaster and then spread the Jam on... ...mmmmmmmm looks good.
 Shannon trying the first bite of our first Strawberry-Rhubarb Jam. She loved it and so did the rest of us. We brought 2 Jars to my Mom....had to as she helped supply the ingredients, and we even gave one to the neighbors. For my first attempt at making a Jam I am very very pleased with the results.